How to get started with your new FB6000 series product and how to reset the configuration. (PDF Version)
You configure your FireBrick using a web browser - to do this, you need a local IP connection between your computer and the FireBrick. There are several ways to get connected…
Method 1 - use the FireBrick's DHCP server to configure a computer
If your computer is already configured (as most are) to get an IP address automatically, connect your computer to port 0 on the FireBrick, and the FireBrick's inbuilt DHCP server should give it an IP address. You can then access the web control pages using your browser. The FireBrick's IP address will be 10.0.0.1 and 2001:DB8::1
Method 2 - configure a computer with a fixed IP address
Alternatively, you can connect a computer to port 0 and manually configure your computer to have a fixed IP address eg 10.0.0.2 or 2001:DB8::2. You can then use a browser to access the FireBrick's web pages on http://10.0.0.1 and http://[2001:DB8::1]
Method 3 - use an existing DHCP server to configure the FireBrick
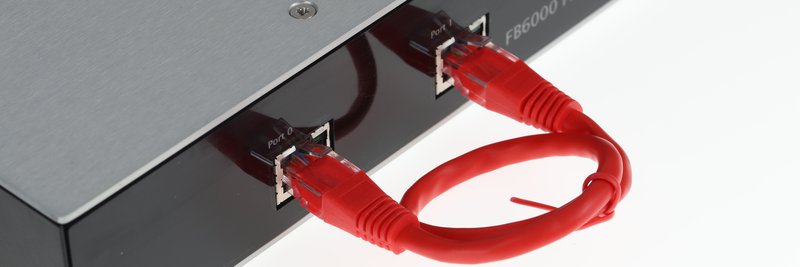
If your LAN has a DHCP server then do not connect port 0 to your LAN as it will clash with your server. Instead, connect port 1 to your LAN and the FireBrick will get an IP address automatically. Check your DHCP server to find the address allocated and access this IP address using your web browser.
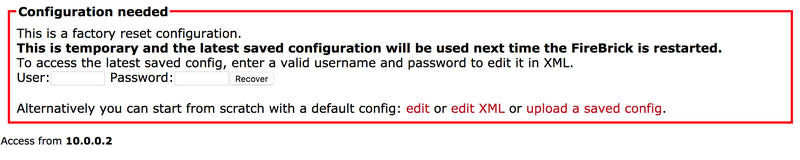
Following these instructions you should reach the FireBrick's web control pages which prominently displays "Configuration needed". Click the "edit configuration" link, which will take you to the configuration setup wizard covering initial steps.
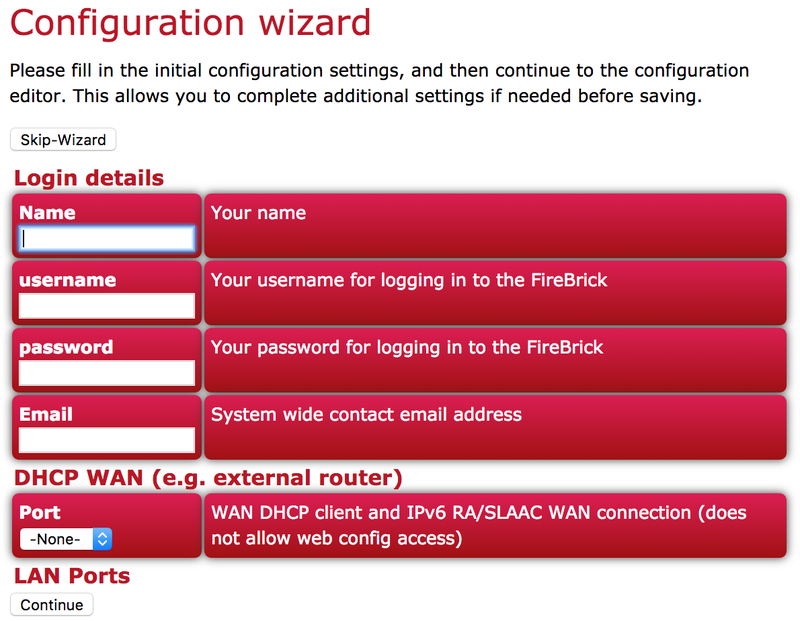
You now need to add a user with a password in order to gain full access to the FireBrick's user interface. Using the wizard you can specify username, full name, and password. Or you can skip the wizard to add a user if you prefer.
The FireBrick can have many subnets at once. The 2001:DB8::1 and 10.0.0.1 addresses are temporary and should be removed, but we recommend you add new addresses and test they work as expected before removing these temporary addresses. The wizard removes these, and adds the subnet(s) you specify.
Having changed the config, using the wizard or XML editor, select “Save” and you will see a page showing the progress of storing the new configuration in Flash memory. On this page there is a "Login" link - click on this link and then log in using the username and password you chose. You can then set up the rest of the FireBrick's configuration.
We recommend the following minimum settings
The FB6000's configuration can be restored to the state it was in when shipped from the factory. These procedures require physical access to the FB6000 or the use of a serial connection. These procedures can be also be applied if you have made configuration changes that have resulted in loss of access to the web user interface, or any other situation where it is appropriate to start from scratch - for example, commissioning an existing unit for a different role, or where you've forgotten an administrative user password.
It is also possible to temporarily reset the FB6000 to allow you to recover and edit a broken configuration (though you still need to know the password you had).
This requires physical access.
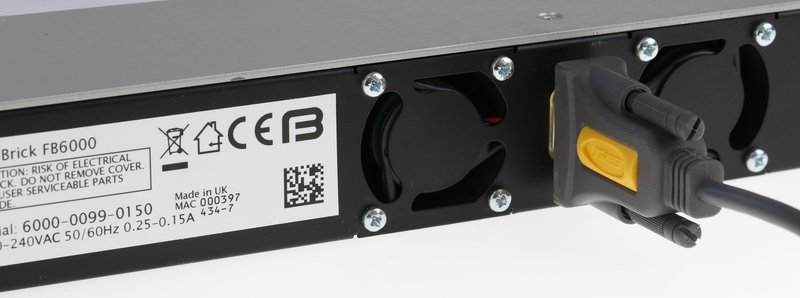
The FB6000 has a serial port, you can enter the bootloader whilst the unit is booting and from there you can (carefully) delete a recent config file causing the FireBrick to load a previous config. (The Firebrick will save a number of previous config files). The sequence of commands you'll need are:
c - Show the blocks
d [block number] - delete the block
q - quit and boot
